Image

Archive for holidays – Page 3

celebrate . Autumn in our Corners

fall_decorations5

It’s beginning to look like Fall! It’s even beginning to feel like Fall — especially in the mornings! This is probably my favorite time of year, and I love having small bits of autumn celebration tucked into various corners around the house. We make a production out of getting our “decorations” out of the attic, and I love that the kids know where things are “supposed” to go. They’re getting older, but I still see that gleam in their eye when they see little jack-o-lanterns, pumpkins they made in preschool, and scarecrows. We pull out some of our nature artifacts — feathers and “horse apples” from the farm, driftwood from the coast, cotton bolls from the pumpkin patch — and combine them with trinkets from past years, and hand-crafted items we’ve found in the Smoky Mountains. Dollar store finds from this year mix with dime store items from when I was a child and parts of costumes my mom made for me to wear. I guess those are “vintage” now — ha! We’ve been decked out for fall for a few weeks and will enjoy the warmth and inspiration through Thanksgiving. Here are a few glimpses of our autumn corners. Enjoy!

fall_decorations1

fall_decorations2

fall_decorations4

fall_decorations7

fall_decorations8

fall_decorations6

fall_decorations3

make . Paper Pumpkins

pumpkins1

Last week I spent a little time restocking my Small Pond “pop-up” shop with some fall items and a new collection of stationery. The pop-up is located in the Liza Tye & Company shopping mall on Academy Road in Starkville, and I hope you’ll take a few minutes to take a look and shop all the great vendors there if you are in the area! Some of the fall items I included are a couple of paper craft pumpkin centerpieces I created from hand-decorated paper, and today I’m sharing a little of the process. They are not difficult to make at home, and are a great way to repurpose already-used paper.

paper_pumpkins8

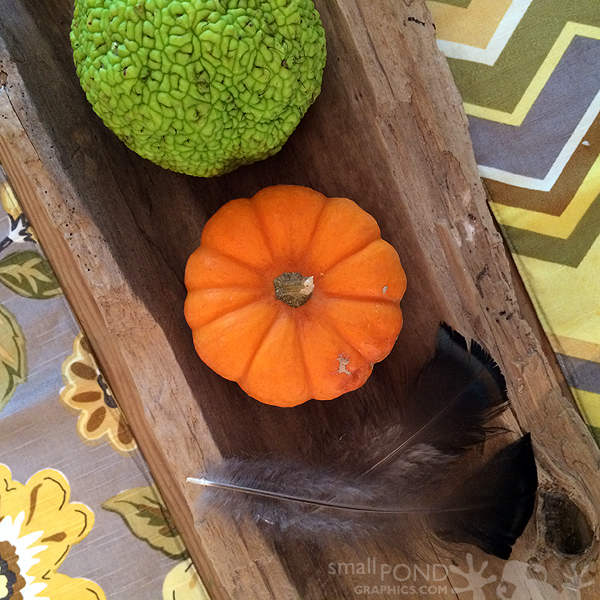
I found a few colored sheets of paper in various textures, and hand-painted some with patterns. Card stock weight paper works best for what’s required for crafting this piece.

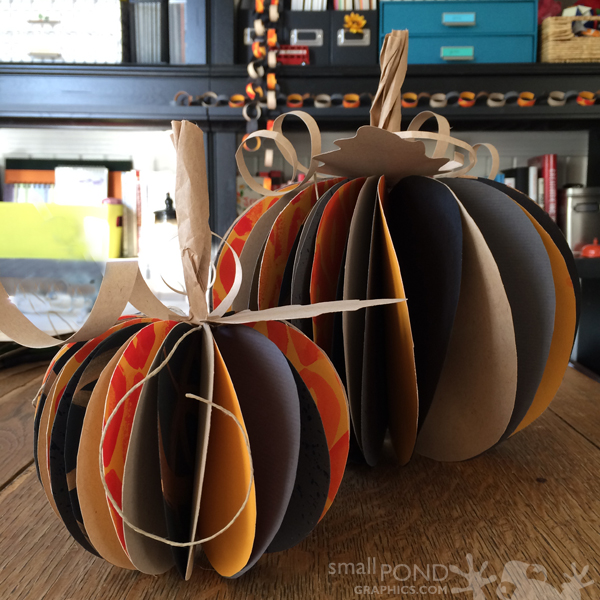
The pattern for the individual pumpkin parts can really be any shape you want, as long as it’s symmetrical. Creating your pattern along a fold helps to ensure it is identical on both sides. For the two sizes of pumpkins shown above, I used 20 pumpkin shapes for the larger 8 1/2″ centerpiece, and 16 pumpkin shapes for the smaller 5″ version. Each pumpkin shape needs to be folded in half to create the centerpiece.

paper_pumpkins9

Once all the paper parts are cut and folded, they are stacked together in the repetitive order you would like to use for your pumpkin. Tie the shapes together tightly with twine at the center point to hold them all together. I chose a small jute twine that could curl around the pumpkin top like tiny vines.

paper_pumpkins5

Hot glue or some other very quick-drying version works best for this project since the pieces will end up fanning out into a sphere like an accordion. For the best fanning look, I alternated gluing tops together and then bottoms of the pumpkins as shown above. Keep going all the way through the stack until the piece forms a full pumpkin.

paper_pumpkins6

Pumpkin definitely needs leaves and vines, which I cut from one of my paper colors. Card stock can be easily spiraled by twisting it around a pencil. To finish out the pumpkin, I used a square of thin, kraft packing material to form the stem. I wadded up the paper first to crinkle it, and then rolled it into a loose tube and twisted for an organic look.

paper_pumpkins2

Make a slit in the bottom of the “stem” and hot glue to the top of the pumpkin. Then, add leaves and vines to suit your tastes.

paper_pumpkins3

paper_pumpkins4

For our Thanksgiving table, I’m working on a version of the pumpkins made from all white and off-white paper, some in hand-made flower petal-infused paper I found. I’m hoping to add a little hand-dipped watercoloring for some subtle harvest look. There are so many options for decorating paper to match any tablescape style — from fun craftiness to artisan elegance. You can purchase the pumpkins at Liza Tye or create some of your own!

Happy pumpkin-making!

make . Easter Egg Holders [printable]

eggholders4

I’ve been getting into cute bunny mode this week since the kids helped me get down the box of our Easter decorations this weekend. I decided to use a couple of the bunnies from this year’s Easter gift tags (plus a few new watercolor illustrations) to create these printable egg holders. Baby Girl and I had a fun time making the samples! Just click the image below to download the printable. Print the designs onto cardstock, and cut along the dotted lines and around the illustrations. Then, cut the slits shown and thread together to create rings. These would probably be cute napkin rings for a little tea party as well! Enjoy!

eggholders_printable

eggholders5

eggholders1

eggholders2

print shop . 2015 Personalized Easter Tags

Spring is almost here! We’re getting ready to pull out our decorations for Easter and spring’s new beginning, and I’ve decided to offer a small collection of happy tags to celebrate. I’ve been having fun creating this family of bunnies and “Happy Easter” sentiments. I’d love to personalize some for your little bunnies for Easter or Spring parties, teacher gifts, or happies to share with friends!

easter_sharegraphic1 easter_sharegraphic2

see . Our First Nutcracker in Memphis

We were so excited to spend a three-day weekend in Memphis, Tennessee last week, and I thought I would share some of my favorite wonders from the trip! I’ve shared glimpses of our Memphis visits before, but we’ve never traveled there during the Christmas season. We were there mainly to see Ballet Memphis’ performance of The Nutcracker, accompanied by the Memphis Symphony. It was our first time to see the Nutcracker, and we had been planning the trip since we were in Memphis for another ballet last April. The ballet is a must-see experience of such wonderful costumes, sets, sounds and, of course, stellar ballet for all ages, and the 20’s gilt of The Orpheum makes it more special. Baby Girl (my own budding ballerina) was enthralled, but my boys had just as much fun! They all had their favorite parts… the death of the Mouse King, Godfather Drosselmeyer’s magic, the way the christmas tree grew for the soldier/mice battle, the snowflake scene, and my personal favorite, the amazing dance of the Sugar Plum Fairy and her Cavalier!

orpheum_carraige

babygirl

[ looking for the marquee ]

Our fave rides on the Main Street trolley were cancelled this trip because the lines are shut down for about another year for repairs, but we were fortunate to find some horse and carriage rides to take us to the Orpheum. In addition to an amazing performance of the ballet, a trip to the zoo (twice) and the Children’s Museum of Memphis, we also enjoyed some fun walks Downtown, a few games of hide-and-seek in Court Square across from our hotel, some personal attention from Mr. Ridda — owner of the renown Peanut Shoppe on Main (more on that later), and we even found two new restaurants that we’ll add to our list of favorites. Here are some of my favorite photos from the trip…

downtown4

orpheum3

orpheum2

orpheum

downtown2

kress

[ restored lobby of the Kress building on Main — I have an ongoing love affair with this old Art Deco building. I’ll share some of my photo collection in another post! ]

blueplate2

[ Blue Plate Cafe at Court Square — a mean french toast ]

pizzacafe

[ Memphis Pizza Cafe at Overton Square on Madison Ave — now tied with our beloved Aldo’s for the Montgomery “Best Pizza in Memphis” cred with a yummy blackened chicken sandwich as well! ]

blue

[ blue lights replacing the water in the Court Square fountain — why am I hearing Elvis sing “Blue Christmas”? ]

blue2

Divider Footer